Getting Started
If you don't know how to make an overlay application, it's recommended to start from SteamVR Overlay Tutorial for Unity.
1. Install SteamVR Plugin
Add the SteamVR Unity Plugin to your assets by "Add to My Assets" button on the Asset Store. Ovrle UI depends OpenVR dll to show a dashboard that includes in the SteamVR Plugin. https://assetstore.unity.com/packages/tools/integration/steamvr-plugin-32647
2. Create new project
- Create a new Unity project with 3D template.
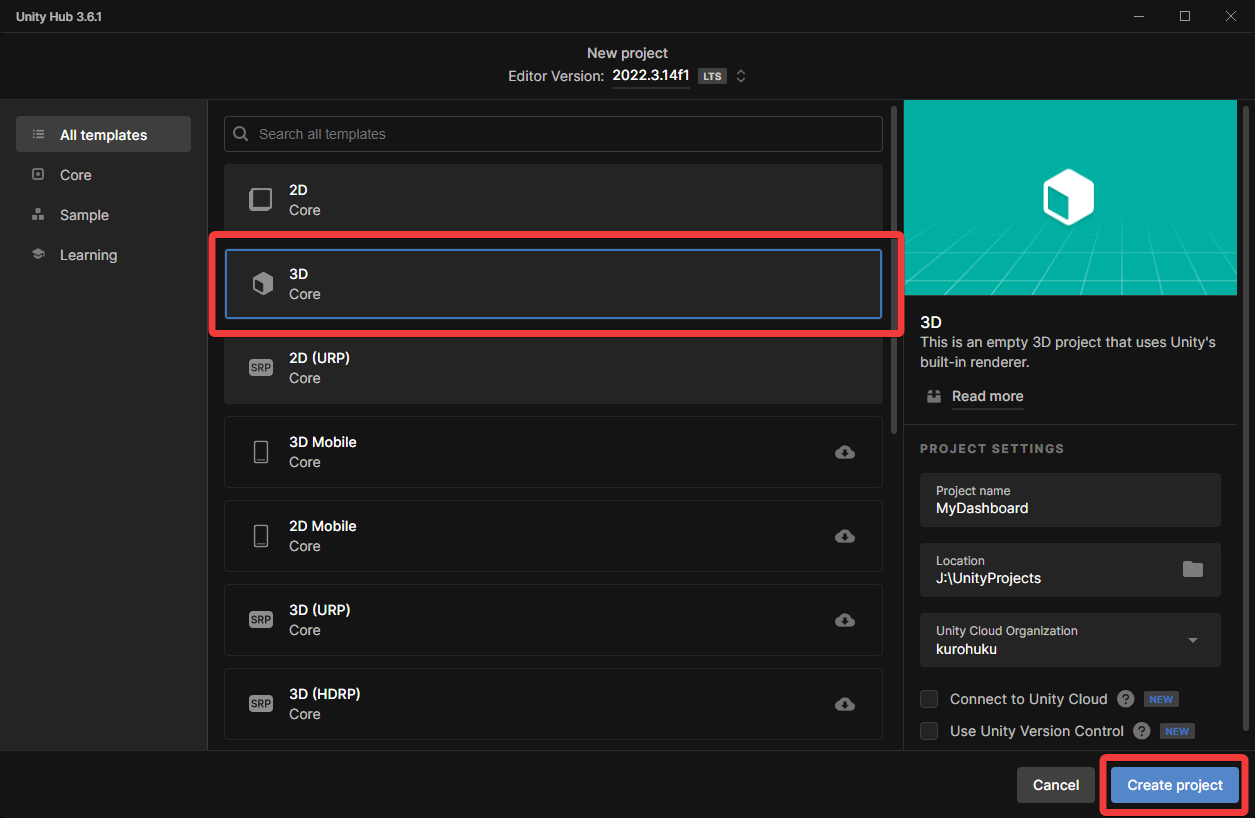
- Remove Main Camera and Directional Light from the scene.
3. Install packages
- Install SteamVR Unity Plugin from Unity Asset Store.
- Install Ovrle UI from Unity Asset Store.
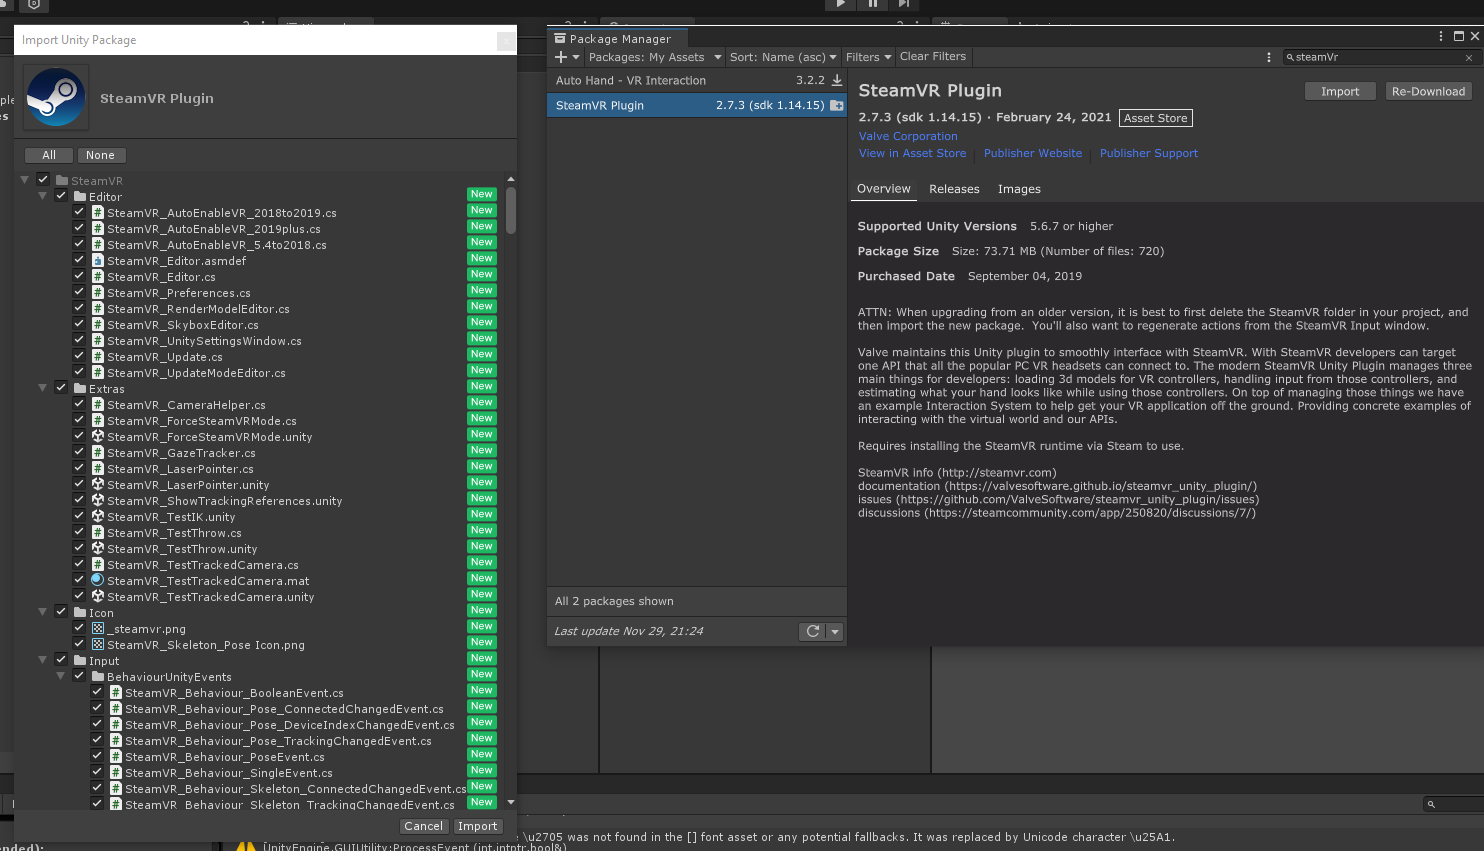
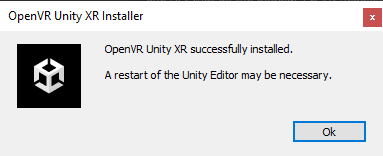
After install SteamVR plugin, you may need to restart Unity.
4. SteamVR Plugin setting
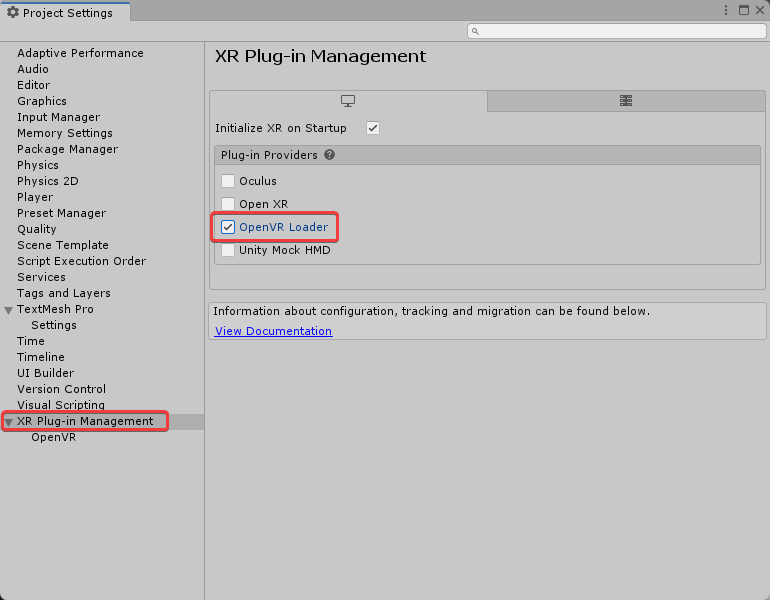
Open Unity project settings by Edit > Project Settings.
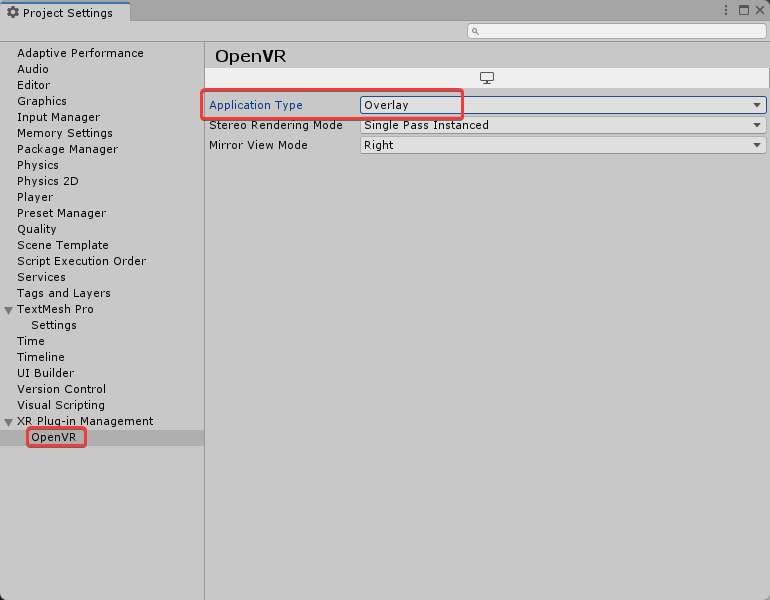
Select XR Plug-in Management, and check OpenVR Loader.
Select OpenVR, and change Application Type to Overlay.
5. Add a dashboard to the scene.
Let's make SteamVR dashboard.
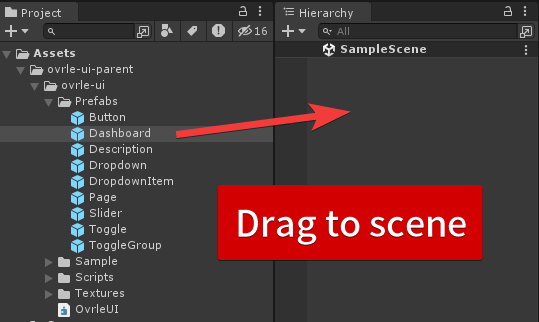
Create empty scene and drag and drop /Assets/ovrle-ui/Prefabs/Dashboard to the scene.
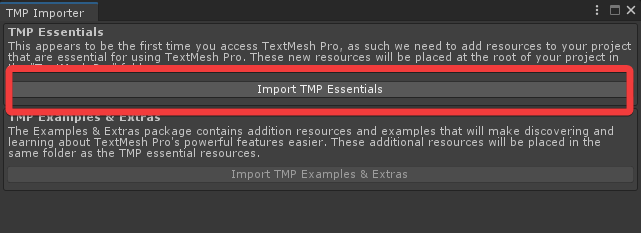
Unity may show TMP Importer window to import TextMeshPro essential files. Then Click "Import TMP Essentials" button.
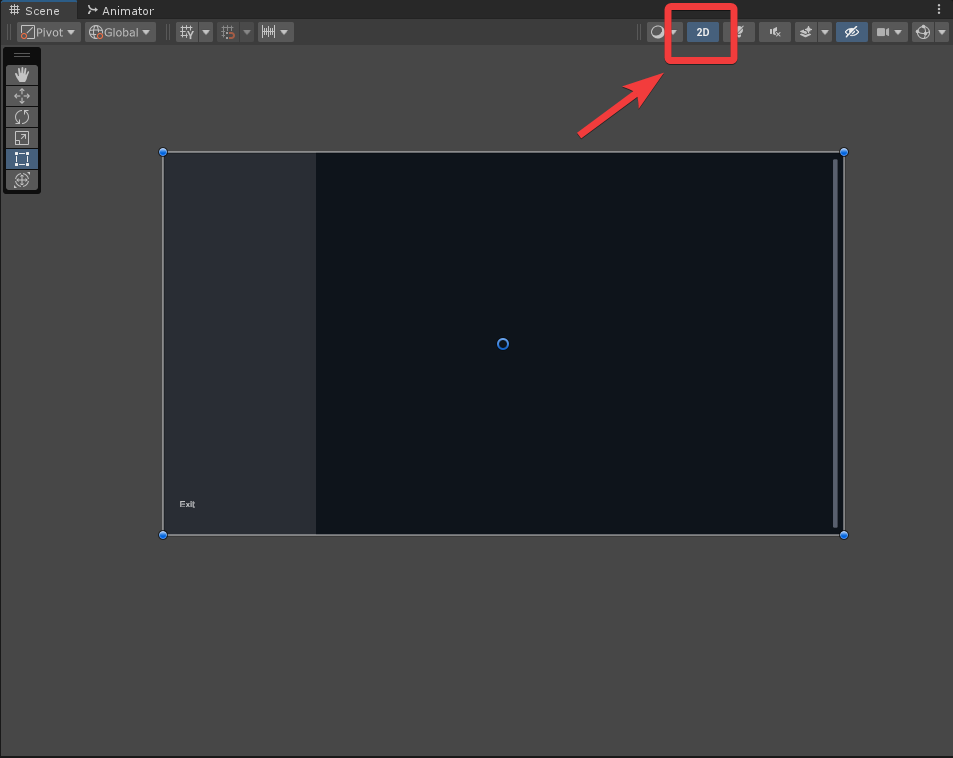
Now, empty dashboard is created in the scene. Toggle to 2D mode to ease UI editing.
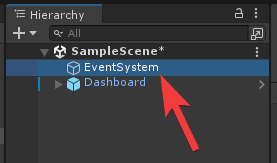
Dashboard automatically create EventSystem game object on the root of the hierarchy.
Note
Dashboard overlay needs EventSystem in the scene to process uGUI events. If no EventSystem in the scene, it automatically created.
6. View dashboard in VR
Click Unity play button. If SteamVR is not launched, it automatically launched.
Unity creates an empty dashboard overlay in the SteamVR. Check it in VR.
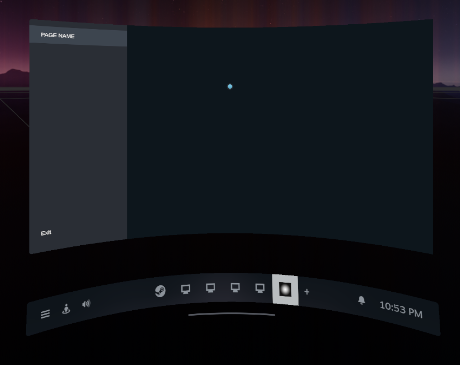
You made an empty dashboard! Click Unity stop button.
7. Add button to dashboard
Let's add a button and get the click event.
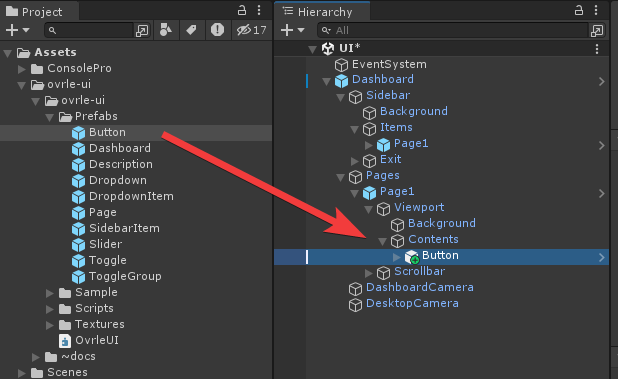
Drag Button prefab into Contents game object (Dashboard > Pages > Page1 > Viewport > Contents).

Create a new folder "Assets/Scripts" and create a C# script as "Assets/Scripts/Controller.cs". Copy and paste the following code to the script.
using UnityEngine;

public class Controller : MonoBehaviour
{
    public void OnButtonClick()
    {
        Debug.Log("Dashboard button clicked!");
    }
}
Create a empty game object named "Controller" in the scene and attach Controller.cs to it.
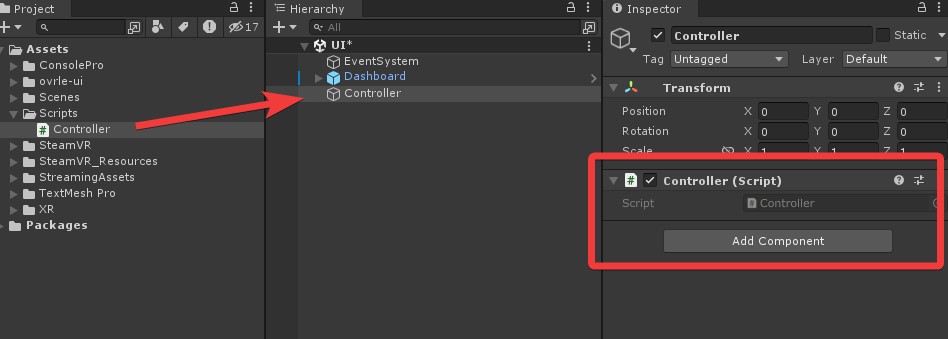
Select the Button object and attach Controller.OnClick() to OnClick event in the Button inspector.
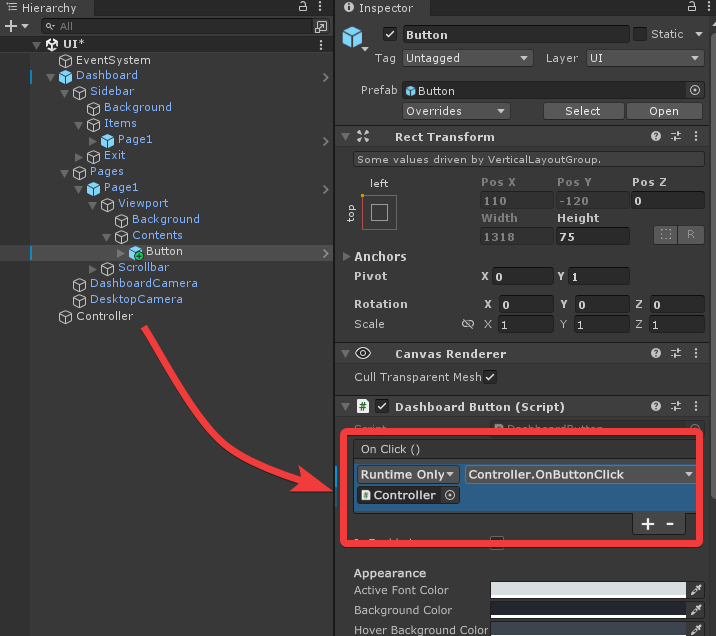
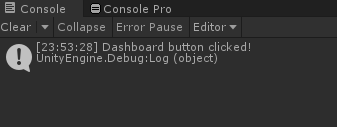
Let's play and click the button in SteamVR. You can see the log message in the console.
Tip
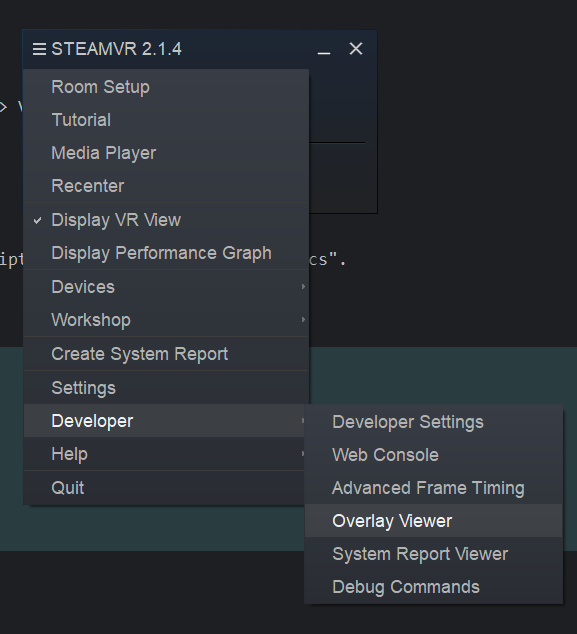
You can test your overlay via SteamVR Overlay Viewer.
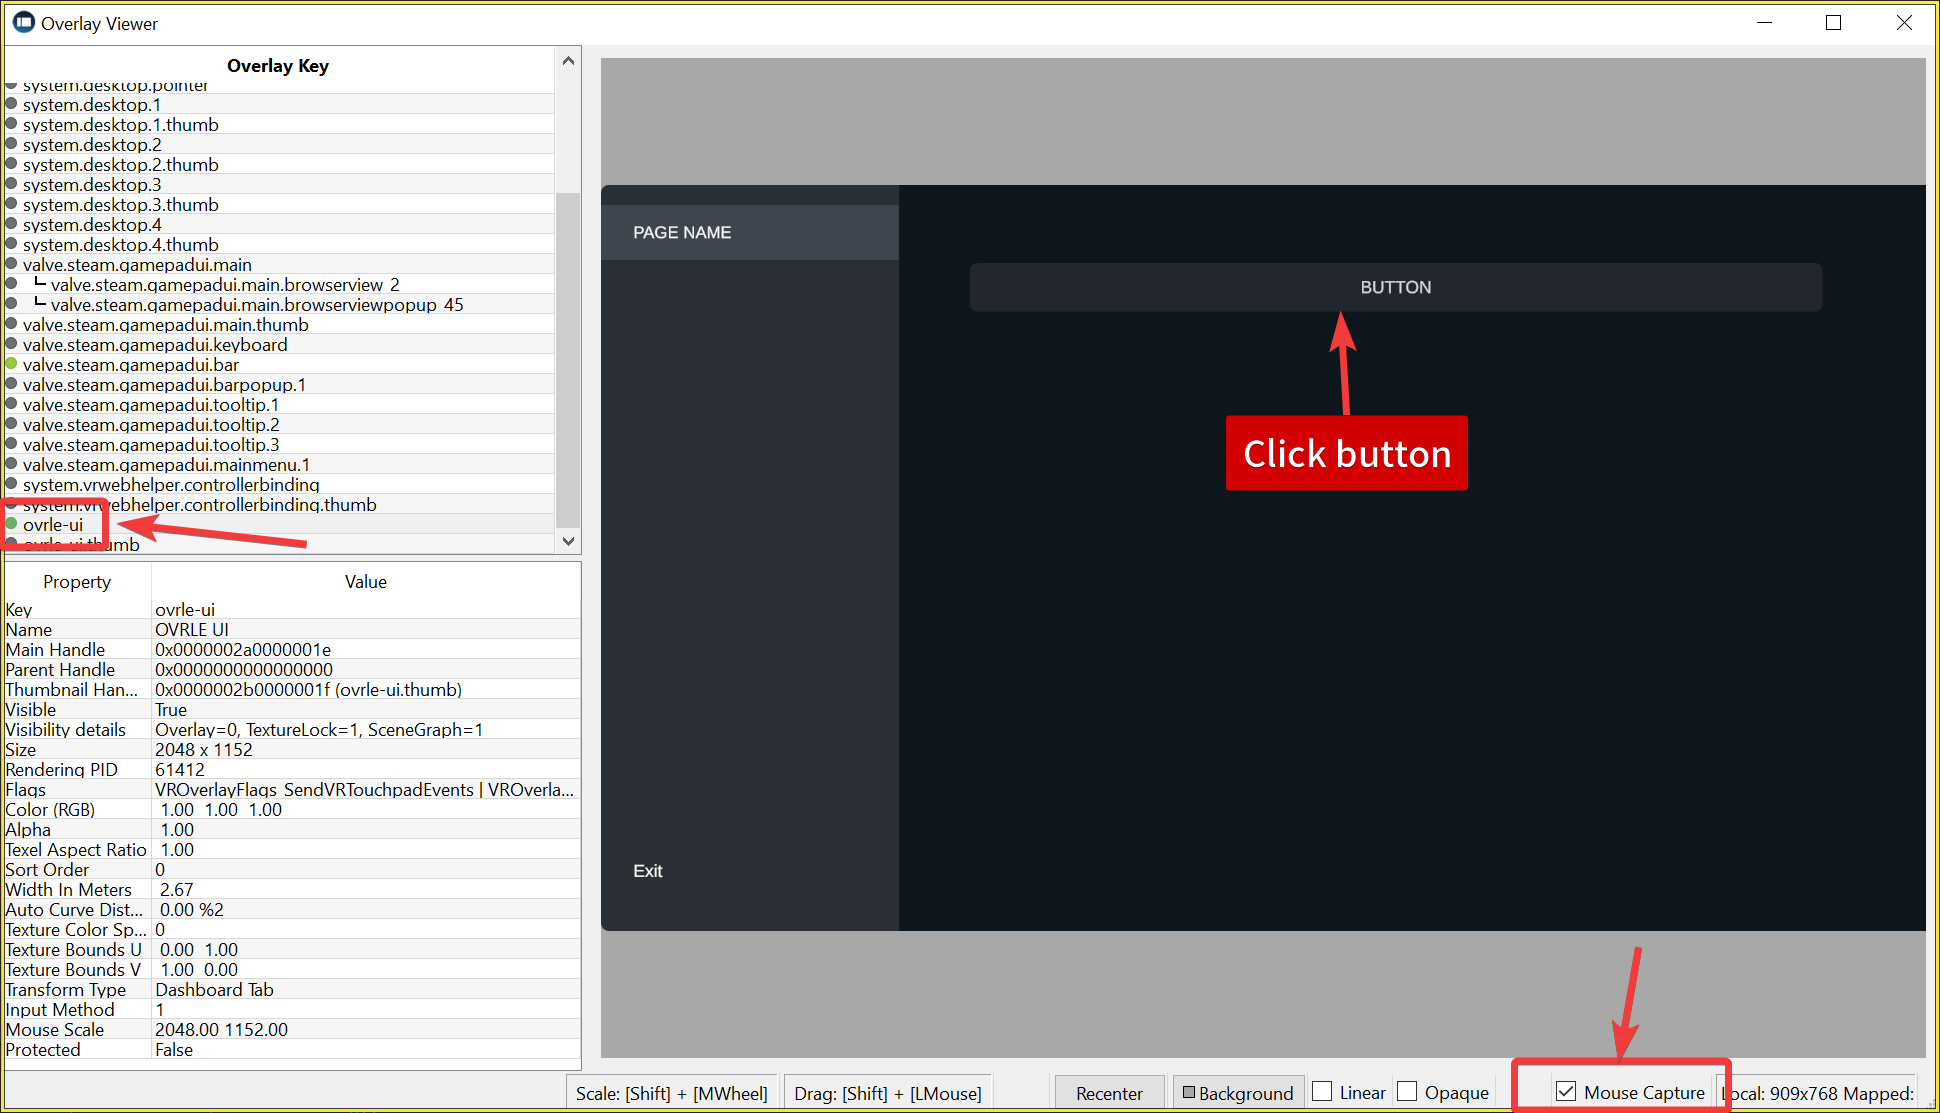
Select ovrle-ui from left overlay list and tick "Mouse Capture" and click the button in right top preview.
8. Additional Resources
Getting Started is completed!
- If you try other elements like Toggle, Slider, Dropdown, etc, please see UI Elements
- Dashboard overlay prefab has some options. Please see DashboardOverlay reference
- If you need support? Contact to developer via Discord server #ovrle-ui channel or X.
- This UI library is from an overlay tool "OVR Locomotion Effect" that avoid VR sickness. If you are interested check it on Steam Store.